2022年04月28日
jquery:show()、hide()
このメソッドの説明
show()、hide() はjQueryメソッドです。
要素を表示/非表示する事により、複数要素を切替えるアニメーションに利用します。
・現在要素の非表示:hide()
・次の要素の表示 :show()
メソッド
セレクタ.show( effect , options , duration , complete )
セレクタ.hide ( effect , options , duration , complete )
パラメータ
effect (文字列)(省略可)
要素を開閉する時のeffect(効果)を指定します。
options (文字列)(省略可)
effect 毎に定められた「オプション名」と「値 」を指定します。
指定方法は{ オプション名① : 値 , オプション名② : 値 }の形式で記述します。
duration (整数 | 指定パラメータ)(省略可)
表示/非表示の実行時間
初期値:0(パラメータが何も指定されてない場合)
パラメータを指定した場合は:400ms
数値で指定する以外に下記の文字列でも可
・'slow' :600ms
・'normal':400ms
・'fast' :200ms
complete (関数)(省略可)
show()/hide()後に実行する関数
1.表示効果を指定しない事例
①パラメータを何も指定しない画像切替
下記のボタンを挿入して下さい。
画像は4枚あります。
次の画像、前の画像で画像を切りかえます。開閉時間は0秒です。
上記のプログラムは下記になります。
<div style='display:flex;'>
	<button type='button' class='next01' style='padding:5px 10px;'>次の画像</button>
	<button type='button' class='prev01' style='padding:5px 10px;margin-left:5px;'>前の画像</button>
</div>
<div class='slide_target' style='position:relative;margin-top:5px;'>
	<img class='item01'  style='width:300px;position:absolute;top:0;left:0;' src='https://hnw.ddnsfree.com/school/wp-content/uploads/2020/12/crown.jpg'>
	<img class='item01'  style='width:300px;position:absolute;top:0;left:0;' src='https://hnw.ddnsfree.com/school/wp-content/uploads/2020/12/alphard.jpg'>
	<img class='item01'  style='width:300px;position:absolute;top:0;left:0;' src='https://hnw.ddnsfree.com/school/wp-content/uploads/2020/12/86.jpg'>
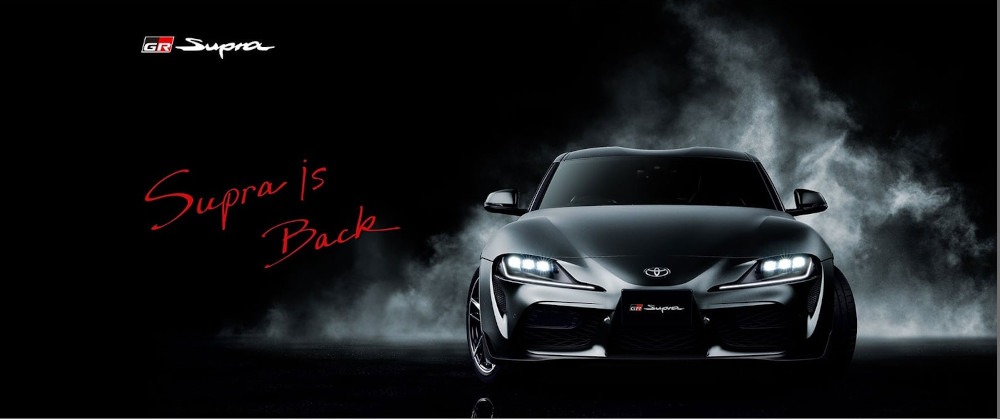
	<img class='item01'  style='width:300px;position:absolute;top:0;left:0;' src='https://hnw.ddnsfree.com/school/wp-content/uploads/2021/12/supra.jpg'>
</div>
<script>
	$(function(){
		var slide_no = 0;
		$('.item01').css('display' , 'none');                   // 画像を総て非表示にする
		$('.item01').eq(slide_no).css('display' , 'block');// 先頭の画像を表示する
		$('.next01').click(function(){
			if(slide_no <= 2){
				$('.item01').eq(slide_no).hide();// 現在の画像を非表示
				slide_no = slide_no + 1;
				$('.item01').eq(slide_no).show();// 次の画像を表示
			}
		});
		$('.prev01').click(function(){
			if(slide_no >= 1){
				$('.item01').eq(slide_no).hide();// 現在の画像を非表示
				slide_no = slide_no - 1;
				$('.item01').eq(slide_no).show();// 前の画像を表示
			}
		});
	});
</script>
■14~15行目
画面が呼び込まれた後、先頭の画像だけを表示しています。
■次の画像ボタンが挿入された時:16~22行目
現在の画像を非表示にして、次の画像を表示しています。
■前の画像ボタンが挿入されて時:23~29行目
現在の画像を非表示にして、前の画像を表示しています。
② callback を指定した画像切替
下記のボタンを挿入して下さい。
画像を表示した後の処理で、画面に表示するボタンを選択しています。
又、callbackパラメータを指定したので、開閉時間は400msになります。
上記のプログラムは下記になります。
<div style='display:flex;'>
	<button type='button' class='next02' style='padding:5px 10px;'>次の画像</button>
	<button type='button' class='prev02' style='padding:5px 10px;margin-left:5px;'>前の画像</button>
</div>
<div class='slide_target' style='position:relative;margin-top:5px;'>
	<img class='item02'  style='width:300px;position:absolute;top:0;left:0;' src='https://hnw.ddnsfree.com/school/wp-content/uploads/2020/12/crown.jpg'>
	<img class='item02'  style='width:300px;position:absolute;top:0;left:0;' src='https://hnw.ddnsfree.com/school/wp-content/uploads/2020/12/alphard.jpg'>
	<img class='item02'  style='width:300px;position:absolute;top:0;left:0;' src='https://hnw.ddnsfree.com/school/wp-content/uploads/2020/12/86.jpg'>
	<img class='item02'  style='width:300px;position:absolute;top:0;left:0;' src='https://hnw.ddnsfree.com/school/wp-content/uploads/2021/12/supra.jpg'>
</div>
<script>
	$(function(){
		var slide_no = 0;
		$('.item02').css('display' , 'none');                    // 画像を総て非表示にする
		$('.item02').eq(slide_no).css('display' , 'block');// 先頭の画像を表示する
		$('.prev02').css('display' , 'none');                    // 前の画像ボタンを非表示にする
		$('.next02').click(function(){
				$('.item02').eq(slide_no).hide();// 現在の画像を非表示
				slide_no = slide_no + 1;
				$('.item02').eq(slide_no).show(function(){// 次の画像を表示
					if(slide_no == 3){
						$('.next02').css('display' , 'none');
						$('.prev02').css('display' , 'block');
					}
					else{
						$('.next02').css('display' , 'block');
						$('.prev02').css('display' , 'block');
					}
				});
		});
		$('.prev02').click(function(){
			$('.item02').eq(slide_no).hide();// 現在の画像を非表示
			slide_no = slide_no - 1;
				$('.item02').eq(slide_no).show(function(){// 前の画像を表示
					if(slide_no == 0){
						$('.next02').css('display' , 'block');
						$('.prev02').css('display' , 'none');
					}
					else{
						$('.next02').css('display' , 'block');
						$('.prev02').css('display' , 'block');
					}
				});
		});
	});
</script>
■14~16行目
画面が呼び込まれた後、先頭の画像だけを表示しています。また前の画像ボタンを非表示にしています。
■次の画像ボタンが挿入された時:17~30行目
現在の画像を非表示にして、次の画像を表示しています。また表示した後に表示すべきボタンを指定しています。
■前の画像ボタンが挿入されて時:31~44行目
現在の画像を非表示にして、前の画像を表示しています。また表示した後に表示すべきボタンを指定しています。
■表示時間を0にする場合はshowの指定を下記に変更します。
.show(function(){ ➡ .show(0,function(){
2.表示効果を指定した事例
下記の表示効果(エフェクト)を利用する為には JQuery UI が必要となります。
導入の仕方は、jQuery機能の追加 を参照してください。
| 項番 | JQuery UI | 説明 |
| ① | slide | 滑る様に移動する効果です。
スライドさせる方向と移動量が指定できます。 |
| ② | drop | 落とすように移動する効果です。
ドロップさせる方向が指定できます。 |
| ③ | blind | ブラインドを降ろす様な効果です。
ブラインドの方向が指定できます。 |
| ④ | clip | 上下や左右にクリップする効果です。
クリップする方向を上下か左右を指定できます。 |
| ⑤ | fold | 上や左に縮める効果です。
縮めるサイズと方向を指定できます。 |
| ⑥ | fade | 徐々に消し、徐々に表示させる効果です。
パラメータはありません。 |
| ⑦ | scale | 縮小/拡大させる効果です。
縮小/拡大の基点を中心、左上、右下を選択できます。 sizeとの違いは、縮小方向を垂直や左右で指定できる点です。 |
| ⑧ | size | 縮小/拡大させる効果です。
縮小/拡大の基点を中心、左上、右下を選択できます。 scaleとの違いは、縮小後のサイズを指定できる事です。 |
| ⑨ | puff | 膨らませる効果です。
膨らませでなく、縮める効果を選択できます。 |
| ⑩ | bounce | バウンドさせる効果です。
バウンド量と回数を指定できます。 |
| ⑪ | explode | 要素を分割して爆破させる効果です。
分割数を指定できます。 |
| ⑫ | pulsate | 要素を点滅させる効果です。
点滅させる回数を指定できます。 |
| ⑬ | shake | 要素をシェイクする効果です。
振る方向、振り幅、回数を指定できます。 |
スライド(滑る様に移動する)効果で要素を表示/非表示します。一覧リストに戻る
| オプション名 | 説明 |
| direction | スライドする方向を指定する
{direction:'left'} : 左から表示(show)、左に非表示(hide) {direction:'right'} : 右から表示(show)、右に非表示(hide) {direction:'up'} : 上から表示(show)、上に非表示(hide) {direction:'down'} : 上から表示(show)、上に非表示(hide) |
| distance | 移動量を指定します。
幅が200pxの要素を横にスライドさせる場合、 デフォルトは、210ぐらいになります。 200にするとブラインドの様な動きになります。 300にすると画面から完全に消えるまでスライドします。 |
■指定方法は('slide',{direction:値, distance:値})で指定します。
事例
■左ボタン:左にスライドさせます。
■右ボタン:右にスライドさせます。
<div style='display:flex;'>
	<button type='button' class='left01' style='padding:5px 10px;'>左</button>
	<button type='button' class='right01' style='padding:5px 10px;margin-left:5px;'>右</button>
</div>
<div class='slide_target' style='position:relative;margin-top:5px;'>
	<img class='img_item01'  style='width:300px;position:absolute;top:0;left:0;' src='https://hnw.ddnsfree.com/school/wp-content/uploads/2020/12/crown.jpg'>
	<img class='img_item01'  style='width:300px;position:absolute;top:0;left:0;' src='https://hnw.ddnsfree.com/school/wp-content/uploads/2020/12/alphard.jpg'>
	<img class='img_item01'  style='width:300px;position:absolute;top:0;left:0;' src='https://hnw.ddnsfree.com/school/wp-content/uploads/2020/12/86.jpg'>
	<img class='img_item01'  style='width:300px;position:absolute;top:0;left:0;' src='https://hnw.ddnsfree.com/school/wp-content/uploads/2021/12/supra.jpg'>
</div>
<script>
	$(function(){
		var slide_no = 0;
		$('.img_item01').css('display' , 'none');              // 画像を総て非表示にする
		$('.img_item01').eq(slide_no).css('display' , 'block');// 先頭の画像を表示する
		$('.left01').click(function(){
			if(slide_no <= 2){
				$('.img_item01').eq(slide_no).hide('slide' , {direction:'left'});// 現在の画像を左に非表示
				slide_no = slide_no + 1;
				$('.img_item01').eq(slide_no).show('slide' , {direction:'right'});// 次の画像は右から表示
			}
		});
		$('.right01').click(function(){
			if(slide_no >= 1){
				$('.img_item01').eq(slide_no).hide('slide' , {direction:'right'});// 現在の画像は右に非表示
				slide_no = slide_no - 1;
				$('.img_item01').eq(slide_no).show('slide' , {direction:'left'});// 次の画像は左から表示
			}
		});
	});
</script>
■左ボタン:16~22行目
現在の画像は左に消去、次の画像は右から表示しています。
■右ボタン:23~29行目
現在の画像は右に消去、次の画像は左から表示しています。
■タイマーで無限ループさせる方法はタイマー処理を参照して下さい。
ドロップ(落とすように移動する)効果で要素を表示/非表示します。一覧リストに戻る
| オプション名 | 説明 |
| direction | ドロップさせる方向を指定する
{direction:'leftl'} : 左から表示(show)、左に非表示(hide) {direction:'right'} : 右から表示(show)、右に非表示(hide) {direction:'up'} : 上から表示(show)、上に非表示(hide) {direction:'down'} : 下から表示(show)、下に非表示(hide) |
■指定方法は('drop',{direction:値})で指定します。
事例
■左ボタン:左にドロップさせます。
■右ボタン:右にドロップさせます。
|
<div style='display:flex;'>
	<button type='button' class='left02' style='padding:5px 10px;'>左</button>
	<button type='button' class='right02' style='padding:5px 10px;margin-left:5px;'>右</button>
</div>
<div class='slide_target' style='position:relative;margin-top:5px;'>
	<img class='img_item02'  style='width:300px;position:absolute;top:0;left:0;' src='https://hnw.ddnsfree.com/school/wp-content/uploads/2020/12/crown.jpg'>
	<img class='img_item02'  style='width:300px;position:absolute;top:0;left:0;' src='https://hnw.ddnsfree.com/school/wp-content/uploads/2020/12/alphard.jpg'>
	<img class='img_item02'  style='width:300px;position:absolute;top:0;left:0;' src='https://hnw.ddnsfree.com/school/wp-content/uploads/2020/12/86.jpg'>
	<img class='img_item02'  style='width:300px;position:absolute;top:0;left:0;' src='https://hnw.ddnsfree.com/school/wp-content/uploads/2021/12/supra.jpg'>
</div>
<script>
	$(function(){
		var slide_no = 0;
		$('.img_item02').css('display' , 'none');              // 画像を総て非表示にする
		$('.img_item02').eq(slide_no).css('display' , 'block');// 先頭の画像を表示する
		$('.left02').click(function(){
			if(slide_no <= 2){
				$('.img_item02').eq(slide_no).hide('drop' , {direction:'left'});// 現在の画像は左に消去
				slide_no = slide_no + 1;
				$('.img_item02').eq(slide_no).show('drop' , {direction:'right'});// 次の画像は右から表示
			}
		});
		$('.right02').click(function(){
			if(slide_no >= 1){
				$('.img_item02').eq(slide_no).hide('drop' , {direction:'right'});// 現在の画像は右に消去
				slide_no = slide_no - 1;
				$('.img_item02').eq(slide_no).show('drop' , {direction:'left'});// 次の画像は左から表示
			}
		});
	});
</script>
■左ボタン:16~22行目
現在の画像は左に消去、次の画像は右から表示しています。
■右ボタン:23~29行目
現在の画像は右に消去、次の画像は左から表示しています。
■タイマーで無限ループさせる方法はタイマー処理を参照して下さい。
ブラインド(ブラインドを降ろす様な)効果で要素を表示/非表示します。一覧リストに戻る
| オプション名 | 説明 |
| direction | ブラインドの方向を指定する
{direction:'vertical'} :上から表示(show)、上に非表示(hide) {direction:'down'} :下から表示(show)、下に非表示(hide) {direction:'horizontal'}:左から表示(show)、左に非表示(hide) {direction:'right'} :右から表示(show)、右に非表示(hide) |
■指定方法は('blind',{direction:値})で指定します。
事例
■左ボタン:左にブラインドさせます。
■右ボタン:右にブラインドさせます。
|
<div style='display:flex;'>
	<button type='button' class='left03' style='padding:5px 10px;'>左</button>
	<button type='button' class='right03' style='padding:5px 10px;margin-left:5px;'>右</button>
</div>
<div class='slide_target' style='position:relative;margin-top:5px;'>
	<img class='img_item03'  style='width:300px;position:absolute;top:0;left:0;' src='https://hnw.ddnsfree.com/school/wp-content/uploads/2020/12/crown.jpg'>
	<img class='img_item03'  style='width:300px;position:absolute;top:0;left:0;' src='https://hnw.ddnsfree.com/school/wp-content/uploads/2020/12/alphard.jpg'>
	<img class='img_item03'  style='width:300px;position:absolute;top:0;left:0;' src='https://hnw.ddnsfree.com/school/wp-content/uploads/2020/12/86.jpg'>
	<img class='img_item03'  style='width:300px;position:absolute;top:0;left:0;' src='https://hnw.ddnsfree.com/school/wp-content/uploads/2021/12/supra.jpg'>
</div>
<script>
	$(function(){
		var slide_no = 0;
		$('.img_item03').css('display' , 'none');              // 画像を総て非表示にする
		$('.img_item03').eq(slide_no).css('display' , 'block');// 先頭の画像を表示する
		$('.left03').click(function(){
			if(slide_no <= 2){
				$('.img_item03').eq(slide_no).hide('blind' , {direction:'horizontal'});// 現在の画像は左に非表示
				slide_no = slide_no + 1;
				$('.img_item03').eq(slide_no).show('blind' , {direction:'right'});// 次の画像は右から表示
			}
		});
		$('.right03').click(function(){
			if(slide_no >= 1){
				$('.img_item03').eq(slide_no).hide('blind' , {direction:'right'});// 現在の画像は右に非表示
				slide_no = slide_no - 1;
				$('.img_item03').eq(slide_no).show('blind' , {direction:'horizontal'});// 次の画像は左に表示
			}
		});
	});
</script>
■左ボタン:16~22行目
現在の画像は左に消去、次の画像は右から表示しています。
■右ボタン:23~19行目
現在の画像は右に消去、次の画像は左から表示しています。
■タイマーで無限ループさせる方法はタイマー処理を参照して下さい。
クリップ(上下や左右にクリップする)効果を指定します。一覧リストに戻る
| オプション名 | 説明 |
| direction | クリップの方向を指定します。
{direction:'vertical'} :上下から中心に非表示(hide)、中心から上下に表示(show) {direction:'horizontal'}:左右から中心に非表示(hide)、中心から左右に表示(show) |
■指定方法は('clip',{direction:値})で指定します。
事例
■水平方向ボタン:中心から左右に表示(show)、左右から中心に非表示(hide)
■垂直方向ボタン:中心から上下に表示(show)、上下から中心に非表示(hide)
|
<div style='display:flex;'>
	<button type='button' class='hor04' style='padding:5px 10px;'>水平方向</button>
	<button type='button' class='ver04' style='padding:5px 10px;margin-left:5px;'>垂直方向</button>
</div>
<div class='slide_target' style='position:relative;margin-top:5px;'>
	<img class='img_item04'  style='width:300px;position:absolute;top:0;left:0;' src='https://hnw.ddnsfree.com/school/wp-content/uploads/2020/12/crown.jpg'>
	<img class='img_item04'  style='width:300px;position:absolute;top:0;left:0;' src='https://hnw.ddnsfree.com/school/wp-content/uploads/2020/12/alphard.jpg'>
	<img class='img_item04'  style='width:300px;position:absolute;top:0;left:0;' src='https://hnw.ddnsfree.com/school/wp-content/uploads/2020/12/86.jpg'>
	<img class='img_item04'  style='width:300px;position:absolute;top:0;left:0;' src='https://hnw.ddnsfree.com/school/wp-content/uploads/2021/12/supra.jpg'>
</div>
<script>
	$(function(){
		var slide_no = 0;
		$('.img_item04').css('display' , 'none');              // 画像を総て非表示にする
		$('.img_item04').eq(slide_no).css('display' , 'block');// 先頭の画像を表示する
		$('.hor04').click(function(){
			$('.img_item04').eq(slide_no).hide('clip' , {direction:'horizontal'});// 現在の画像は水平方向(外から中)に非表示
			slide_no = slide_no + 1;
			if(slide_no >= 4){slide_no = 0}
			$('.img_item04').eq(slide_no).show('clip' , {direction:'horizontal'});// 次の画像は水平方向(中から外)に表示
		});
		$('.ver04').click(function(){
			$('.img_item04').eq(slide_no).hide('clip' , {direction:'vertical'});// 現在の画像は垂直方向(外から中)に非表示
			slide_no = slide_no + 1;
			if(slide_no >= 4){slide_no = 0}
			$('.img_item04').eq(slide_no).show('clip' , {direction:'vertical'});// 次の画像は垂直方向(中から外)に表示
		});
	});
</script>
■水平方向ボタン:16~21行目
中心から左右に表示(show)、左右から中心に非表示(hide)
■垂直方向ボタン:22~27行目
中心から左右に表示(show)、左右から中心に非表示(hide)
■タイマーで無限ループさせる方法はタイマー処理を参照して下さい。
ホールド(上や左に縮める)効果を指定します。一覧リストに戻る
| オプション名 | 説明 |
| size | 縮めた後のサイズ
数値で指定します。初期値は15px 見えなくする時は size:1 で指定します。 |
| horizFirst | 縮める順番
false:垂直方向に縮めます true :水平方向に縮めます |
■指定方法は('fold',{size:n,horizFirst,真偽値},アニメ時間)で指定します。
アニメ時間を1000(1秒)位に指定しないと挙動が良く分かりません。
事例
■水平方向ボタン:左から右に消去(hide)、左から右に表示(show)
■垂直方向ボタン:下から上に消去(hide)、上から下に表示(show)
|
<div style='display:flex;'>
	<button type='button' class='hor05' style='padding:5px 10px;'>水平方向</button>
	<button type='button' class='ver05' style='padding:5px 10px;margin-left:5px;'>垂直方向</button>
</div>
<div class='slide_target' style='position:relative;margin-top:5px;'>
	<img class='img_item05'  style='width:300px;position:absolute;top:0;left:0;' src='https://hnw.ddnsfree.com/school/wp-content/uploads/2020/12/crown.jpg'>
	<img class='img_item05'  style='width:300px;position:absolute;top:0;left:0;' src='https://hnw.ddnsfree.com/school/wp-content/uploads/2020/12/alphard.jpg'>
	<img class='img_item05'  style='width:300px;position:absolute;top:0;left:0;' src='https://hnw.ddnsfree.com/school/wp-content/uploads/2020/12/86.jpg'>
	<img class='img_item05'  style='width:300px;position:absolute;top:0;left:0;' src='https://hnw.ddnsfree.com/school/wp-content/uploads/2021/12/supra.jpg'>
</div>
<script>
	$(function(){
		var slide_no = 0;
		$('.img_item05').css('display' , 'none');              // 画像を総て非表示にする
		$('.img_item05').eq(slide_no).css('display' , 'block');// 先頭の画像を表示する
		$('.hor05').click(function(){
			$('.img_item05').eq(slide_no).hide('fold',{size:1,horizFirst:true},1000);// 現在の画像は水平方向(左に)非表示
			slide_no = slide_no + 1;
			if(slide_no >= 4){slide_no = 0}
			$('.img_item05').eq(slide_no).show('fold',{size:1,horizFirst:true},1000);// 次の画像は水平方向(左から)表示
		});
		$('.ver05').click(function(){
			$('.img_item05').eq(slide_no).hide('fold',{size:1},1000);// 現在の画像は垂直方向(上に)非表示
			slide_no = slide_no + 1;
			if(slide_no >= 4){slide_no = 0}
			$('.img_item05').eq(slide_no).show('fold',{size:1},1000);// 次の画像は垂直方向(上から)表示
		});
	});
</script>
■水平方向ボタン:16~21行目
左から右に消去(hide)、右から左に表示(show)。アニメ時間は1秒
■垂直方向ボタン:22~27行目
下から上に消去(hide)、上から下に表示(show)。アニメ時間は1秒
■タイマーで無限ループさせる方法はタイマー処理を参照して下さい。
フェイド(徐々に消し、徐々に表示させる)効果を指定します。一覧リストに戻る
指定できるパラメータはありません。
事例
■次へボタン:現在の画像をフェードで消し、次の画像をフェードで表示します。
|
|
<button type='button' class='next06' style='padding:5px 10px;'>次へ</button>
<div class='slide_target' style='position:relative;margin-top:5px;'>
	<img class='img_item06'  style='width:300px;position:absolute;top:0;left:0;' src='https://hnw.ddnsfree.com/school/wp-content/uploads/2020/12/crown.jpg'>
	<img class='img_item06'  style='width:300px;position:absolute;top:0;left:0;' src='https://hnw.ddnsfree.com/school/wp-content/uploads/2020/12/alphard.jpg'>
	<img class='img_item06'  style='width:300px;position:absolute;top:0;left:0;' src='https://hnw.ddnsfree.com/school/wp-content/uploads/2020/12/86.jpg'>
	<img class='img_item06'  style='width:300px;position:absolute;top:0;left:0;' src='https://hnw.ddnsfree.com/school/wp-content/uploads/2021/12/supra.jpg'>
</div>
<script>
	$(function(){
		var slide_no = 0;
		$('.img_item06').css('display' , 'none');              // 画像を総て非表示にする
		$('.img_item06').eq(slide_no).css('display' , 'block');// 先頭の画像を表示する
		$('.next06').click(function(){
			$('.img_item06').eq(slide_no).hide('fade',2000);// 現在の画像をフェードで非表示(2秒)
			slide_no = slide_no + 1;
			if(slide_no >= 4){slide_no = 0}
			$('.img_item06').eq(slide_no).show('fade',2000);// 次の画像をはフェードで表示(2秒)
		});
	});
</script>
■次へボタン:16~21行目
現在の画像をフェードで消去し、次の画像をフェードで表示します。(2秒)
■タイマーで無限ループさせる方法はタイマー処理を参照して下さい。
スケール(拡大/縮小)効果を指定します。一覧リストに戻る
縮小/拡大の基点を中心、左上、右下を選択できます。
⑧のsizeとの違いは、縮小方向を垂直や左右で指定できる点です。
| オプション名 | 説明 |
| origin | 縮小/拡大する基点
中心:[ 'middle' , 'center' ]デフォルト 左上:[ 'top' , 'left' ] 右下:[ 'bottom' , 'right' ] |
| percent | 拡大するか縮小するか?をパーセントで指定します。
初期値:0 100未満は縮小 100以上は拡大 |
| direction | 縮小/拡大する方向
'both':両方が対象(初期値) 'vertical':水平方向の縮小/拡大 percentに0以外(例:1)を指定する必要がある。 'horizontal':垂直方向の縮小/拡大 percentに0以外(例:1)を指定する必要がある。 |
| scale | リスケールの対象要素
'both':総ての要素を縮小対象とする(デフォルト) 'box':要素のborderとpaddingを縮小対象とする。 'content':要素のテキストを縮小対象とする。 |
■指定方法は('scale',{origin:値, percent:値 ,・・・},アニメ時間)で指定します。
事例
■中心ボタン:中心に縮小して非表示、中心から拡大して表示させます。
■左上ボタン:左上に縮小して非表示、左上から拡大して表示させます。
■水平方向ボタン:水平方向に縮小して非表示、水平方向に拡大して表示させます。
|
<div style='display:flex;'>
	<button type='button' class='center07' style='padding:5px 10px;'>中心</button>
	<button type='button' class='topleft07' style='padding:5px 10px;margin-left:5px;'>左上</button>
	<button type='button' class='hor07' style='padding:5px 10px;margin-left:5px;'>水平方向</button>
</div>
<div class='slide_target' style='position:relative;margin-top:5px;'>
	<img class='img_item07'  style='width:300px;position:absolute;top:0;left:0;' src='https://hnw.ddnsfree.com/school/wp-content/uploads/2020/12/crown.jpg'>
	<img class='img_item07'  style='width:300px;position:absolute;top:0;left:0;' src='https://hnw.ddnsfree.com/school/wp-content/uploads/2020/12/alphard.jpg'>
	<img class='img_item07'  style='width:300px;position:absolute;top:0;left:0;' src='https://hnw.ddnsfree.com/school/wp-content/uploads/2020/12/86.jpg'>
	<img class='img_item07'  style='width:300px;position:absolute;top:0;left:0;' src='https://hnw.ddnsfree.com/school/wp-content/uploads/2021/12/supra.jpg'>
</div>
<script>
	$(function(){
		var slide_no = 0;
		$('.img_item07').css('display' , 'none');              // 画像を総て非表示にする
		$('.img_item07').eq(slide_no).css('display' , 'block');// 先頭の画像を表示する
		$('.center07').click(function(){
			$('.img_item07').eq(slide_no).hide('scale',1000);// 現在の画像は中心に縮小して非表示
			slide_no = slide_no + 1;
			if(slide_no >= 4){slide_no = 0}
			$('.img_item07').eq(slide_no).show('scale',1000);// 次の画像は中心から拡大して表示
		});
		$('.topleft07').click(function(){
			$('.img_item07').eq(slide_no).hide('scale',{origin:['top','left']},1000);// 現在の画像は左上に縮小して非表示
			slide_no = slide_no + 1;
			if(slide_no >= 4){slide_no = 0}
			$('.img_item07').eq(slide_no).show('scale',{origin:['top','left']},1000);// 次の画像は左上から拡大して表示
		});
		$('.hor07').click(function(){
			$('.img_item07').eq(slide_no).hide('scale',{direction:'horizontal',percent:1},1000);// 現在の画像は水平方向に縮小して非表示
			slide_no = slide_no + 1;
			if(slide_no >= 4){slide_no = 0}
			$('.img_item07').eq(slide_no).show('scale',{direction:'horizontal',percent:1},1000);// 次の画像は水平方向に拡大して表示
		});
	});
</script>
■中心ボタン:17~22行目
中心に縮小して非表示、中心から拡大して表示させます。アニメ時間は1秒
■左上ボタン:23~28行目
左上に縮小して非表示、左上から拡大して表示させます。アニメ時間は1秒
■水平方向ボタン:29~34行目
水平方向に縮小して非表示、水平方向に拡大して表示させます。
■タイマーで無限ループさせる方法はタイマー処理を参照して下さい。
サイズ(拡大/縮小)効果を指定します。一覧リストに戻る
縮小/拡大の基点を中心、左上、右下を選択できます。
⑦のscaleとの違いは、縮小後のサイズを指定できる事です。
| オプション名 | 説明 |
| from | アニメーション開始のサイズ。この事例ではあまり意味がないパラメータ。 |
| to | アニメーション完了後のサイズ。デフォルトは0です。
to:{width:n,height:m}で指定します。 注意点1:幅と高さは波括弧{}で括ります。 注意点2:これを指定すると収束点は['top','left'] になります。 |
| origin | 効果の収束点
中心:origin:['middle','center'] デフォルト 左上:origin:['top','left'] 注意点:角括弧[]で括ります。 右下:origin:['bottom','right'] 注意点:角括弧[]で括ります。 |
| scale | リスケールの対象要素
'both':総ての要素を縮小対象とする(デフォルト) 'box':要素のborderとpaddingを縮小対象とする。 'content':要素のテキストを縮小対象とする。 |
■指定方法は('size',{origin:値,・・・},アニメ時間)で指定します。
事例
■中心ボタン:中心に縮小して非表示、中心から拡大して表示させます。
■左上ボタン:左上に縮小して非表示、左上から拡大して表示させます。
■サイズ指定のタン:左上に100まで縮小して非表示、左上の100から拡大して表示させます。
|
<div style='display:flex;'>
	<button type='button' class='center08' style='padding:5px 10px;'>中心</button>
	<button type='button' class='topleft08' style='padding:5px 10px;margin-left:5px;'>左上</button>
	<button type='button' class='size08' style='padding:5px 10px;margin-left:5px;'>サイズ指定</button>
</div>
<div class='slide_target' style='position:relative;margin-top:5px;'>
	<img class='img_item08'  style='width:300px;position:absolute;top:0;left:0;' src='https://hnw.ddnsfree.com/school/wp-content/uploads/2020/12/crown.jpg'>
	<img class='img_item08'  style='width:300px;position:absolute;top:0;left:0;' src='https://hnw.ddnsfree.com/school/wp-content/uploads/2020/12/alphard.jpg'>
	<img class='img_item08'  style='width:300px;position:absolute;top:0;left:0;' src='https://hnw.ddnsfree.com/school/wp-content/uploads/2020/12/86.jpg'>
	<img class='img_item08'  style='width:300px;position:absolute;top:0;left:0;' src='https://hnw.ddnsfree.com/school/wp-content/uploads/2021/12/supra.jpg'>
</div>
<script>
	$(function(){
		var slide_no = 0;
		$('.img_item08').css('display' , 'none');              // 画像を総て非表示にする
		$('.img_item08').eq(slide_no).css('display' , 'block');// 先頭の画像を表示する
		$('.center08').click(function(){
			$('.img_item08').eq(slide_no).hide('size',1000);// 現在の画像は中心に縮小して非表示
			slide_no = slide_no + 1;
			if(slide_no >= 4){slide_no = 0}
			$('.img_item08').eq(slide_no).show('size',1000);// 次の画像は中心から拡大して表示
		});
		$('.topleft08').click(function(){
			$('.img_item08').eq(slide_no).hide('size',{origin:['top','left']},1000);// 現在の画像は左上に縮小して非表示
			slide_no = slide_no + 1;
			if(slide_no >= 4){slide_no = 0}
			$('.img_item08').eq(slide_no).show('size',{origin:['top','left']},1000);// 次の画像は左上から拡大して表示
		});
		$('.size08').click(function(){
			$('.img_item08').eq(slide_no).hide('size',{to:{width:100,height:100}},1000);// 現在の画像サイズを指定して縮小して非表示
			slide_no = slide_no + 1;
			if(slide_no >= 4){slide_no = 0}
			$('.img_item08').eq(slide_no).show('size',{to:{width:100,height:100}},1000);// 次の画像サイズを指定して拡大して表示
		});
	});
</script>
■中心ボタン:17~22行目
中心に縮小して非表示、中心から拡大して表示させます。アニメ時間は1秒
■左上ボタン:23~28行目
左上に縮小して非表示、左上から拡大して表示させます。アニメ時間は1秒
■サイズ指定ボタン:29~34行目
左上に100まで縮小して非表示、左上100から拡大して表示させます。アニメ時間は1秒
■タイマーで無限ループさせる方法はタイマー処理を参照して下さい。
パフ(膨らませ)効果を指定します。一覧リストに戻る
| オプション名 | 説明 |
| percent | 膨らませるか萎ませるかをパーセントで指定します。初期値は 150 なので膨らませ効果になります。
100未満を指定すると萎ませ効果になります。 |
■指定方法は('percent',{percent:値},アニメ時間)で指定します。
事例
■拡大ボタン:現在の画像を50%拡大して消去し、次の画像を拡大から縮小して表示します。
■縮小ボタン:現在の画像を50%縮小して消去し、次の画像を縮小からから拡大して表示します。
|
<div style='display:flex;'>
	<button type='button' class='expand09' style='padding:5px 10px;'>拡大</button>
	<button type='button' class='shrink09' style='padding:5px 10px;margin-left:5px;'>縮小</button>
</div>
<div class='slide_target' style='position:relative;margin-top:5px;'>
	<img class='img_item09'  style='width:300px;position:absolute;top:0;left:0;' src='https://hnw.ddnsfree.com/school/wp-content/uploads/2020/12/crown.jpg'>
	<img class='img_item09'  style='width:300px;position:absolute;top:0;left:0;' src='https://hnw.ddnsfree.com/school/wp-content/uploads/2020/12/alphard.jpg'>
	<img class='img_item09'  style='width:300px;position:absolute;top:0;left:0;' src='https://hnw.ddnsfree.com/school/wp-content/uploads/2020/12/86.jpg'>
	<img class='img_item09'  style='width:300px;position:absolute;top:0;left:0;' src='https://hnw.ddnsfree.com/school/wp-content/uploads/2021/12/supra.jpg'>
</div>
<script>
	$(function(){
		var slide_no = 0;
		$('.img_item09').css('display' , 'none');              // 画像を総て非表示にする
		$('.img_item09').eq(slide_no).css('display' , 'block');// 先頭の画像を表示する
		$('.expand09').click(function(){
			$('.img_item09').eq(slide_no).hide('puff',1000);// 現在の画像を拡大して非表示
			slide_no = slide_no + 1;
			if(slide_no >= 4){slide_no = 0}
			$('.img_item09').eq(slide_no).show('puff',1000);// 次の画像は拓大から縮小して表示
		});
		$('.shrink09').click(function(){
			$('.img_item09').eq(slide_no).hide('puff',{percent:50},1000);// 現在の画像を縮小して非表示
			slide_no = slide_no + 1;
			if(slide_no >= 4){slide_no = 0}
			$('.img_item09').eq(slide_no).show('scale',{percent:50},1000);// 次の画像は拡大してして表示
		});
	});
</script>
■拡大ボタン:16~21行目
現在の画像を50%拡大して消去し、次の画像を拡大から縮小して表示します。
■縮小ボタン:22~27行目
現在の画像を50%縮小して消去し、次の画像を縮小からから拡大して表示します。
■タイマーで無限ループさせる方法はタイマー処理を参照して下さい。
バウンド(要素をバウンドさせる)効果を指定します。一覧リストに戻る
| オプション名 | 説明 |
| distance | バウンドの最大値をピクセル単位で指定します。
初期値:20 |
| times | バウンド回数を指定します。
初期値:5 |
■指定方法は('bounce',{distance:値,times:値},アニメ時間)で指定します。
事例
■次へボタン:現在の画像を消去後、新しい画像をバウンドさせながら表示させます。
|
<div style='display:flex;'>
	<button type='button' class='next10' style='padding:5px 10px;'>次へ</button>
</div>
<div class='slide_target' style='position:relative;margin-top:5px;'>
	<img class='img_item10'  style='width:300px;position:absolute;top:0;left:0;' src='https://hnw.ddnsfree.com/school/wp-content/uploads/2020/12/crown.jpg'>
	<img class='img_item10'  style='width:300px;position:absolute;top:0;left:0;' src='https://hnw.ddnsfree.com/school/wp-content/uploads/2020/12/alphard.jpg'>
	<img class='img_item10'  style='width:300px;position:absolute;top:0;left:0;' src='https://hnw.ddnsfree.com/school/wp-content/uploads/2020/12/86.jpg'>
	<img class='img_item10'  style='width:300px;position:absolute;top:0;left:0;' src='https://hnw.ddnsfree.com/school/wp-content/uploads/2021/12/supra.jpg'>
</div>
<script>
	$(function(){
		var slide_no = 0;
		$('.img_item10').css('display' , 'none');              // 画像を総て非表示にする
		$('.img_item10').eq(slide_no).css('display' , 'block');// 先頭の画像を表示する
		$('.next10').click(function(){
			$('.img_item10').eq(slide_no).hide();// 現在の画像を非表示
			slide_no = slide_no + 1;
			if(slide_no >= 4){slide_no = 0}
			$('.img_item10').eq(slide_no).show('bounce');// 次の画像はバウンドさせながら表示
		});
	});
</script>
■次へボタン:15~20行目
現在の画像を消去し、新しい画像をバウンドさせながら表示させます。
■タイマーで無限ループさせる方法はタイマー処理を参照して下さい。
エクスプロード(爆発)効果を指定します。一覧リストに戻る
| オプション名 | 説明 |
| pieces | 分割する個数を指定します
初期値:9(3×3) 取れる値は 4,9,16,25 の値です。 |
■指定方法は('explode',{pieces:値},アニメ時間)で指定します。
事例
■次へボタン:現在の画像をエクスプロードさせて消去し、新しい画像を表示させます。
|
<div style='display:flex;'>
	<button type='button' class='next11' style='padding:5px 10px;'>次へ</button>
</div>
<div class='slide_target' style='position:relative;margin-top:5px;'>
	<img class='img_item11'  style='width:300px;position:absolute;top:0;left:0;' src='https://hnw.ddnsfree.com/school/wp-content/uploads/2020/12/crown.jpg'>
	<img class='img_item11'  style='width:300px;position:absolute;top:0;left:0;' src='https://hnw.ddnsfree.com/school/wp-content/uploads/2020/12/alphard.jpg'>
	<img class='img_item11'  style='width:300px;position:absolute;top:0;left:0;' src='https://hnw.ddnsfree.com/school/wp-content/uploads/2020/12/86.jpg'>
	<img class='img_item11'  style='width:300px;position:absolute;top:0;left:0;' src='https://hnw.ddnsfree.com/school/wp-content/uploads/2021/12/supra.jpg'>
</div>
<script>
	$(function(){
		var slide_no = 0;
		$('.img_item11').css('display' , 'none');              // 画像を総て非表示にする
		$('.img_item11').eq(slide_no).css('display' , 'block');// 先頭の画像を表示する
		$('.next11').click(function(){
			$('.img_item11').eq(slide_no).hide('explode',1000);// 現在の画像を非表示
			slide_no = slide_no + 1;
			if(slide_no >= 4){slide_no = 0}
			$('.img_item11').eq(slide_no).show();// 次の画像はバウンドさせながら表示
		});
	});
</script>
■次へボタン:15~20行目
現在の画像をエクスプロードで消去し、新しい画像を表示させます。アニメ時間は1秒
■タイマーで無限ループさせる方法はタイマー処理を参照して下さい。
パルセイト(要素を点滅させる)効果を指定します。一覧リストに戻る
| オプション名 | 説明 |
| times | 点滅させる回数
初期値:5 |
■指定方法は('pulsate',{times:値},アニメ時間,function(){点滅後の処理})で指定します。
事例
■次へボタン:現在の画像を振動させながら消去し、完了後、次の画像を表示させます。
|
<div style='display:flex;'>
	<button type='button' class='next12' style='padding:5px 10px;'>次へ</button>
</div>
<div class='slide_target' style='position:relative;margin-top:5px;'>
	<img class='img_item12'  style='width:300px;position:absolute;top:0;left:0;' src='https://hnw.ddnsfree.com/school/wp-content/uploads/2020/12/crown.jpg'>
	<img class='img_item12'  style='width:300px;position:absolute;top:0;left:0;' src='https://hnw.ddnsfree.com/school/wp-content/uploads/2020/12/alphard.jpg'>
	<img class='img_item12'  style='width:300px;position:absolute;top:0;left:0;' src='https://hnw.ddnsfree.com/school/wp-content/uploads/2020/12/86.jpg'>
	<img class='img_item12'  style='width:300px;position:absolute;top:0;left:0;' src='https://hnw.ddnsfree.com/school/wp-content/uploads/2021/12/supra.jpg'>
</div>
<script>
	$(function(){
		var slide_no = 0;
		$('.img_item12').css('display' , 'none');              // 画像を総て非表示にする
		$('.img_item12').eq(slide_no).css('display' , 'block');// 先頭の画像を表示する
		$('.next12').click(function(){
			$('.img_item12').eq(slide_no).hide('pulsate',1000,function(){
				slide_no = slide_no + 1;
				if(slide_no >= 4){slide_no = 0}
				$('.img_item12').eq(slide_no).show();
			});
		});
	});
</script>
■次へボタン:15~21行目
現在の画像を振動させながら消去し完了後(callback関数)で次の画像を表示させています。
■タイマーで無限ループさせる方法はタイマー処理を参照して下さい。
シェイク(要素をシェイクする)効果を指定します。一覧リストに戻る
| オプション名 | 説明 |
| direction | 要素を始めに振る方向
初期値:'left' 上記以外に 'right' , 'up' , 'down' が選択可 |
| distance | 振り幅
初期値:20 |
| times | 振る回数
初期値:3 |
■指定方法は('shake',{direction:値,distance:値,times:値,},アニメ時間,function(){シェイク後の処理})で指定します。
事例
■次へボタン:現在の画像をシェイク後に消去し、その完了後に次の画像を表示する。
■右ボタン:右にドロップさせます。
|
<div style='display:flex;'>
	<button type='button' class='next13' style='padding:5px 10px;'>次へ</button>
</div>
<div class='slide_target' style='position:relative;margin-top:5px;'>
	<img class='img_item13'  style='width:300px;position:absolute;top:0;left:0;' src='https://hnw.ddnsfree.com/school/wp-content/uploads/2020/12/crown.jpg'>
	<img class='img_item13'  style='width:300px;position:absolute;top:0;left:0;' src='https://hnw.ddnsfree.com/school/wp-content/uploads/2020/12/alphard.jpg'>
	<img class='img_item13'  style='width:300px;position:absolute;top:0;left:0;' src='https://hnw.ddnsfree.com/school/wp-content/uploads/2020/12/86.jpg'>
	<img class='img_item13'  style='width:300px;position:absolute;top:0;left:0;' src='https://hnw.ddnsfree.com/school/wp-content/uploads/2021/12/supra.jpg'>
</div>
<script>
	$(function(){
		var slide_no = 0;
		$('.img_item13').css('display' , 'none');              // 画像を総て非表示にする
		$('.img_item13').eq(slide_no).css('display' , 'block');// 先頭の画像を表示する
		$('.next13').click(function(){
			$('.img_item13').eq(slide_no).hide('shake',1000,function(){
				slide_no = slide_no + 1;
				if(slide_no >= 4){slide_no = 0}
				$('.img_item13').eq(slide_no).show();
			});
		});
	});
</script>
■次へボタン:15~21行目
現在の画像をシェイクさせながら消去し完了後(callback関数)で次の画像を表示させています。
■タイマーで無限ループさせる方法はタイマー処理を参照して下さい。


